
Sunday, 27 November 2011
Thursday, 24 November 2011
High Speed photography

Ive always wanted to try and capture High Speed shots with my dslr and speedlight however I realised I would need to purchase some kind of trigger to get the flash to work at the exact time that I wanted - below is a short guide for what equipment I used in this experiment which I had fun taking :
High speed images shot using a HSF-ST sound trigger with a delay function attached to:
1x speedlight set to manual 2nd lowest power (2/7th)
Camera - Nikon d90
Lens - Tamron 90mm
Camera settings
f20
5 second shutter speed
200 iso
Camera settings
f20
5 second shutter speed
200 iso
speedlight 30cm bottom left of shot
silver reflector diagonally opposite speedlight
I used a 1.77 metal pellet fired from an air pistol to hit the fruit from a distance of around 1ft away
I have realised I needed another flash or 2 after taking these shots but it was still lots of fun experimenting :-)


Saturday, 17 September 2011
Recently got a Nikon 35mm f/1.8 DX AF lens for a Nikon D5000
Nikon D5000 owners like myself can struggle with lens choices if they want AF, as there are only a limited amount of lens with the motor on the lens - especially if like myself you are on a tight budget.
I currently have a Tamron 90mm 2.8 Macro /Portrait lens which I use for mainly for macro shots. I find this lens gives me sharp detail in my macro shots, (mainly water droplets & flowers) however for portrait shots, I have struggled with indoor range. Most of my indoor shots have been in small living room space, I find myself backed up against the wall in order to compose an image of a person, and get their body in the shot aswell as their head and shoulders.
The Nikon 35mm lens has helped me out considerably with this problem - I can now shoot at a wider angle which has been great for group shots and creative portraits and angles. The aperture of 1.8 is great for blurring the background and making my subject stand out, it has also really helped me out in low light situations. This is a prime lens so there is no zoom function - which is not a huge problem as you can use your feet to move closer or further back from the subject / subjects to get your perfect frame.
Friday, 9 September 2011
Why i choose to shoot in RAW over JPEG in my dslr photography
I think shooting from raw is the best option for creative photography - any work you do on your pictures from the pc via post editing software, will destroy some elements of data from your image, as it needs to compress the files to work on them.

Shooting in RAW allows you to change practically any setting you want (exposure/white balance/ Brightness /contrast) without loosing detail or quality on your shots - it really is simple and you probably wont ever want to shoot in jpeg format again for the images that matter- download a free trial of photoshop or other post edit software to see how easy it is  :)
:)
:)here is a link explaining a little more about the advantages of raw http://www.youtube.com/watch?v=33i-sUT6Kns&feature=related
Have a go for yourself, the possibilities are great, I usually set my camera for RAW and JPEG so I have a choice of which to use :)
Wednesday, 7 September 2011
super quick smoke photography tutorial with a dslr camera & flash


A super quick tutorial on how I captured smoke as a camera project on a rainy day :)
experimenting with smoke photography using an incense stick
placed the incense stick on a table and used a black bedsheet as a background - placed the flash 90deg to the right of the incense and tried to capture movement in the smoke
stopped taking shots after 15mins as the room fills quickly with smoke and makes it hard to focus
f14
1/200th
wb sunny
1 x off camera flashgun
post edit - blue colour filter and duplicated and flipped image horizonally
have a try yourself - the shapes are really unique and can be fun capturing :)
http://www.flickr.com/photos/cheekyangels/
Tuesday, 6 September 2011
Sunday, 31 July 2011
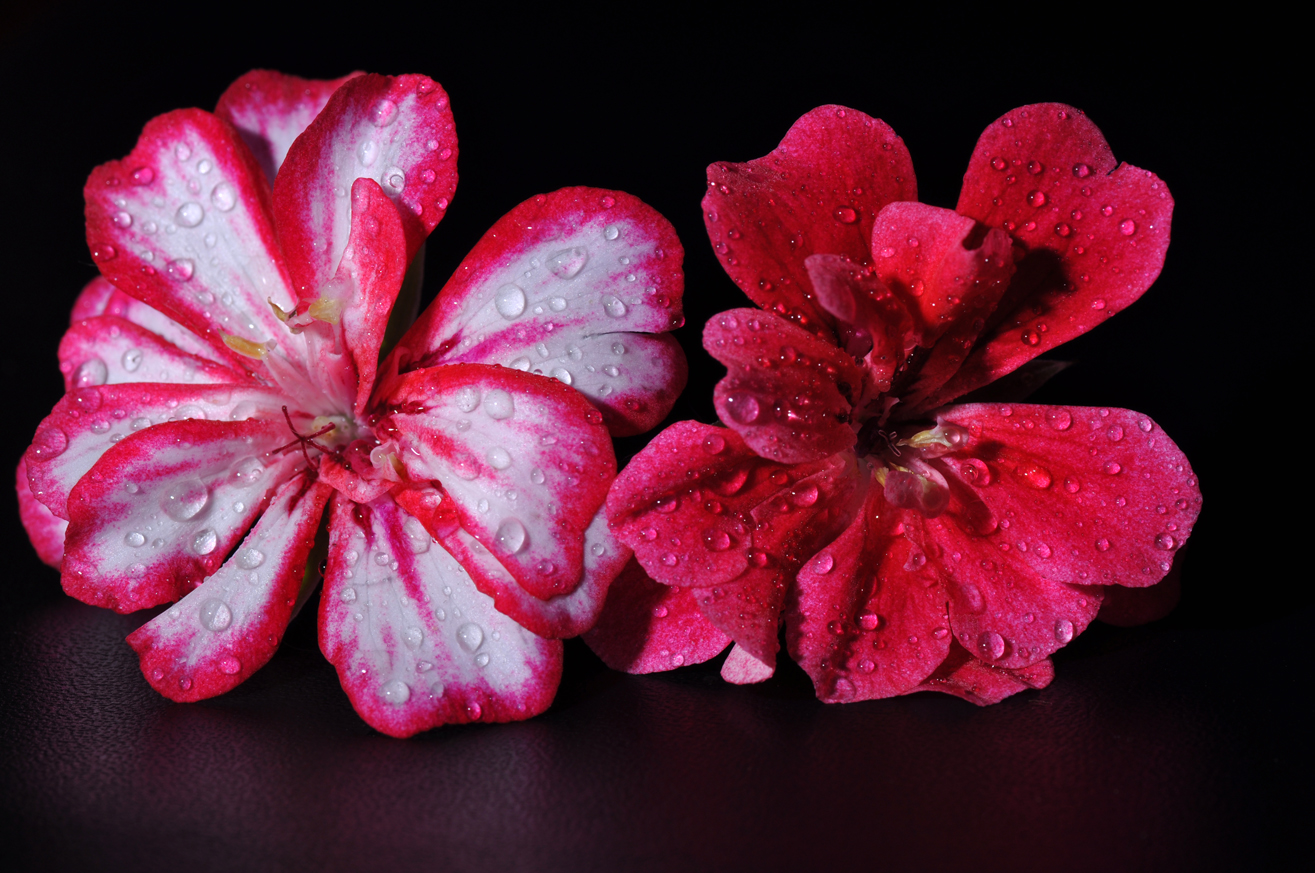
Macro Flower & black background with dslr camera 1 x flash gun

Macro flower capture, with a Nikon D5000 and a Tamron 90mm macro portrait lens.
no processing or crop - please click on the pictures to see the larger images.
1 x strobe bare flash - manual setting, placed to the right hand side of flowers -set to lowest power setting 1/7
3 x wireless remote triggers 1 on camera / 1 on flash / 1 hand held
1 x led light from mobile phone lighting the flowers from below - lighting on a budget :)
1 x led light from mobile phone lighting the flowers from below - lighting on a budget :)
camera settings
F10
1/200
wb sunny
iso 100
F10
1/200
wb sunny
iso 100
framed the picture to try and get all 3 flowers in view - adjusted the focus on the lens manually using the light from the mobile phone led to help keep the sharp edges
Placed a black background behind the flowers approx 30cm away
Took shots from different angles


Saturday, 23 July 2011
Oil and Water macro photography - How to tutorial
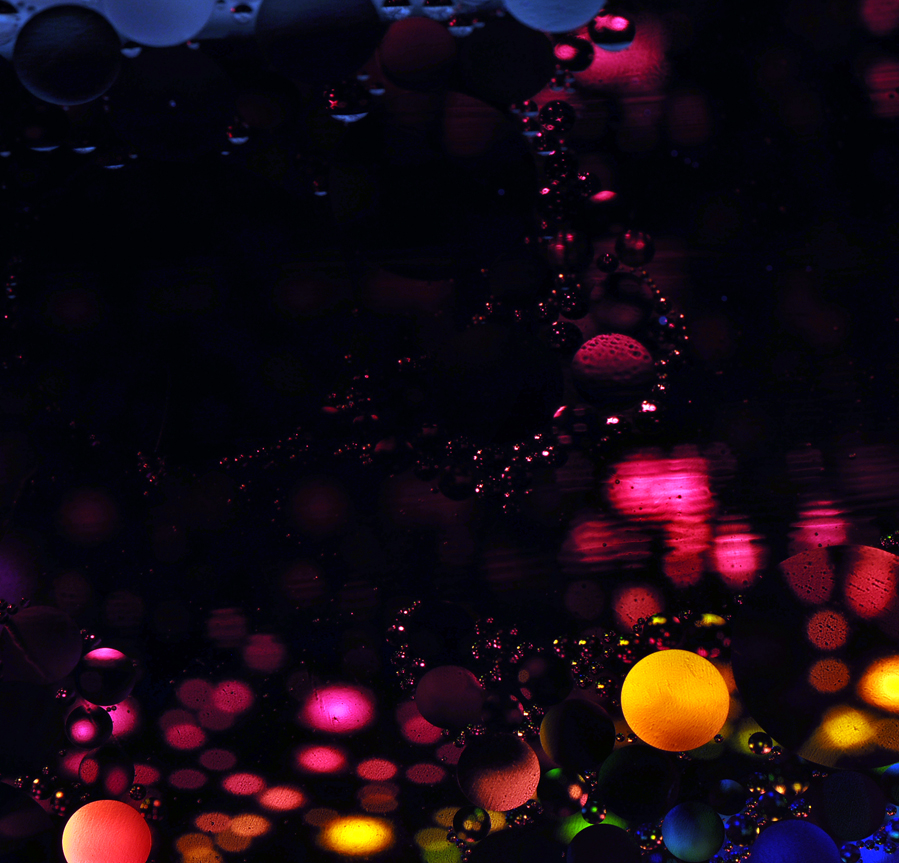
Funky fluid disco lights ☺☻☺
An LED glowsticks colors captured through oil and water
You can make some really interesting images from oil and water, please click here to check out my Flickr 'Oil & Water set.
'crop' and 'auto tone' are the 2 bits of post edit processing.
'crop' and 'auto tone' are the 2 bits of post edit processing.
Basic equipment needed.
Camera - Dslr
Off camera flash / strobe
Tripod
Also needed
- Large glass bowl
- olive oil - few drops
- water - enough to fill the bowl
- colourful background object
Camera settings
f16
1/200 shutter speed
wb sunlight
ISO 100
1/200 shutter speed
wb sunlight
ISO 100
- Rest the large glass bowl between the seats of 2 wooden chairs -or any other flat surface with a gap.
Fill the bowl half way with water, add a few drops of oil, stir a little then wait to settle.
Place a colourful object / objects under the bowl - (approx 12" below the glass bowl)
Focus on the surface of the water not the objects underneath, then bounce flash onto object underneath bowl.

Jamaican flag in abstract colors
A Jamaican flag bracelet captured through Oil & Water
 Flowers and Butterflies
Flowers and butterflies pencil case captured through Oil & Water

Flowers and butterflies pencil case captured through Oil & Water
Thanks so much for checking out my blog - Take Cares ☺☻☺

Sunday, 17 July 2011
Step by Step picture tutorial - How to capture Water droplets with a dslr camera


I've always wanted to capture water droplets as I find the uniqueness of the shapes fascinating.
This tutorial will show you what equipment I used to take the water droplet photos I have posted above -
If you would like to see my other water droplet images please click on the following link: My Flickr Water droplet set
As I am only a beginner in the photography and blogging world, please forgive me for any novice errors in technical terms - If you notice anything that I could change, I would be happy to re -edit the part.
Unfortunately I didnt feature my camera on this tutorial as I am using it to take the 'how to' pictures oops☺
In order to take dslr macro shots, especially of water droplets, you will need to have a dedicated macro lens. A cheaper option would be to buy a close up lens or use extension tubes for your existing lens.
You will also need at least one, off camera flash unit, this can be a TTL compatible flash or any 3rd party flash used on manual mode, with a wireless remote trigger and shutter release cable (i use a £20 2nd hand flash - set to 'manual' mode )
Ok lets get started....... :)
Camera settings
f11 aperture
1/125 shutter speed
200 iso
I also experimented with the cameras WB to change the colour range in some shots.
below is a picture of my camera equipment - the 3rd wireless remote trigger is attached to the bottom hotshoe of the flash.

Equipment:
Nikon D5000
Tamron 90mm Macro lens
Off camera Flash x 1
Wireless remote trigger x 3
As I have never taken shots like this before and I am on a budget, my d.i.y set up for these shots has been really basic.

Additional Equipment
1 x mini tripod (mine is like a gorillapod but doesnt have a name and was alot cheaper £8.99)
1 x 5in1 reflector (mine is 22" £4.99 )
1 x glass pyrex kitchen cooking bowl (£2.99)
1 x black clipboard (£0.69)
1 x pack of neon paper (£0.50)
1 x pack of holographic paper (£0.50)
you will also need a container or bag for the water to drop out of and something to seal the bag with

What I am using:
1 x fold over sandwich bag (pack of 50 £0.50)
2 x stationary clips (pack of 12 (£0.69)
1 x Badge or safety pin (£0.10)
The last item you will need is something to suspend the bag of water from - this can be a cupboard, a door frame, or like i have used - an old worn set of general use household ladders.

Setting up the equipment
Place the glass bowl underneath the ladders and place the black clip board behind the glass bowl - Now place your flash to the side of the glass bowl and facing the clip board, position your camera (not shown in these clips) on the tripod approx 12" away from where the water droplet should fall

The black clipboard can hold any background paper or card you wish to use and will change the colours of your water droplet pictures - try different designs and textures for some amazing images through the water.

You can also try using a reflector as a background and bouncing the flash off the reflector for more colour ranges in your droplets. Or try placing different coloured card underneath the glass dish - (for my droplet images I used black card under the glass bowl

Once you have set up your equipment, its now time to be a big kid again and play & experiment with water Yeay :)
Just make sure you have a towel or cloth ready to wipe up any splashes – remember camera’s and water –do NOT mix !!!!
Fill the glass bowl with water - I fill mine halfway (1") - I have been told the shallower the water, the more crown type shots - the deeper the water the more chance of water orbs and columns - choose whichever style suits you best :)

Then with the remaining water from the jug, fill the plastic bag 1/3 with water

seal the bag - or fold over like the bag i used for my photos

Clip the two stationary clips to the top of the bag so it is secure

Attatch the bag to the underneath of the ladder using the clips to secure, if your ladder doesnt have anywhere for the clips to attach you could also try using some garden wire to attach the clips to the ladder - I have placed some green wire to the ladder to illustrate both methods

another view of the underneath of the ladder and the attached bag of water

I then make a small hole in the bag of water with a safety pin from the badge

This allows droplets to fall into the glass bowl at a slow steady rate.

I used a serrated edged knife to focus my lens approx 2cm above the point at which the droplet hits the water in the bowl. - if you dont have a knife you can also use a ball point pen or similar object to focus the camera on the spot at which you want to capture the detail.

And then start taking pictures - click to your hearts content :)
- The water in the bag lasts for about half and hour before the droplets slow down
- Remember to use a shutter release cable a wireless remote trigger or the timer on your camera to take the shots, this avoids camera shake and gives you a clearer shot
- Also experiment with different backgrounds and droplet heights for more effects
- Try changing the power and the angle of the flash and also try the flash hand held – for different lighting effects –
The pics below are samples of pictures taken with the above set up


The possibilities are endless – just let your imagination run away with you and enjoy capturing the uniqueness of water drops
that is about all I can think of to set up a basic water droplet studio in your living room on a budget - I hope this blog has helped :)
Peace out :)
If you want to see the rest of my waterdroplet set please click here flickr
Please take a look at my youtube slideshow of water droplets youtube
feel free to ask any questions about my set up ☻
Welcome to my blog page
Thanks for checking my blog out ☺☻☺
As this is my first blog im going to try and give a brief introduction about myself.
I'm a female photography hobbyist from the UK, who is having great fun experimenting in the digital world of images.
I got my 1st dslr a Nikon D5000, 7 months ago and am loving my new found hobby of photography - I will post updates on the pictures I have taken and advice on how I captured the images to help other people like me, who have just started taking pictures and are on a tight budget.
I have created this blog to post 'how to guides' about digital photography with a dslr camera.
I am by no means an expert on any aspect of photography, just a keen learner who wants to share my experiences of photography.
My current camera kit comprises of the following
1x Nikon d5000
1x Nikon 18-55mm kit lens
1x Nikon 55-200mm kit lens
1x Tamron 90mm 2.8 macro portrait lens
1x Off camera flash (yongnuo) set to manual
1x shutter release cable3x wireless remote triggers

The picture above is called Glowing glass amber orb, you can see the pic on my flickr account by clicking here flickr
This is a shot taken of a small marble placed on black gloss cardboard, with my Tamron 90mm lens set to 1:1 macro and 1 x off camera flash (1/200 maximum flash sync.
the following manual camera settings were used:
F20 aperture
1/125 Shutter speed
200 iso
Auto white balance
200 iso
Auto white balance
- I had my off-camera flash set to manual and dialed down to lowest power
- I attached a wireless remote trigger to the top of my camera and the shutter release cable to the camera from the trigger
- I attach a wireless remote trigger to the flash unit and positioned it above the marble
- I then pressed one of the other remote triggers to activate the shutter release and take the picture.
I tried positioning the flash which I handheld, onto the marble from different directions.
The shot from above had the flash about 5cm from the marble and slightly to the rear - which enabled the the light from the flash to cast a reflection through the marble.
I composed the picture so the top portion of the marble has been cut off so you dont see the flash gun itself.
Take care and thanks for reading first ever blog - I hope it was ok for a novice.
Feel free to ask any questions ☺☻☺
Subscribe to:
Posts (Atom)